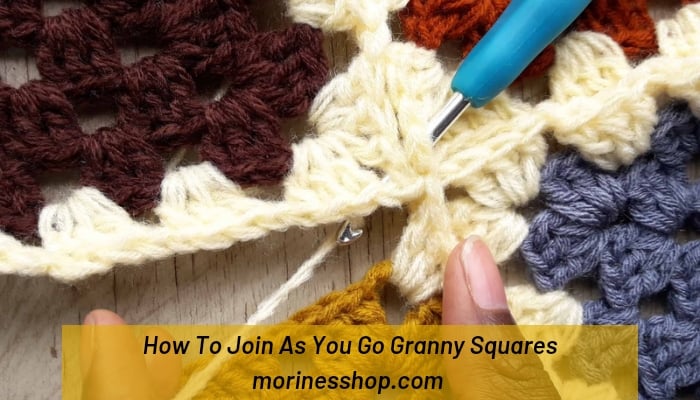
This week’s crochet tutorial is all about the join as you go granny squares aka JAYGO aka JAYG method. I love making blankets using motifs because they work up really fast. What I do not enjoy doing is joining all these motifs. Takes the fun right out of it I tell you. Well, the best solution for someone who has a short attention span or just looking for a fast easy, simple way to join up those motifs is the join as you method.
This post may contain affiliate links. This means that when certain links are clicked on and a purchase is made, we may earn a small commission. Please read our disclosure policy for more information.

Another thing to love about the join as you go granny squares is that it doesn’t provide a visual distraction from the overall look of the pattern. In other words, If you’re working on a project that you want the squares to actually look like they were glued together, this is the method right here! So let’s get to it.
Pin It Now, Read It Later.

Join As You Go Granny Squares.
Materials:
- Yarn
- Hook
- Scissors
- Darning needle
Stitches & Terms Used:
- ch (chain)
- sl st (slip stitch)
- sc (single crochet)
- dc (double crochet)
- rpt (repeat)
Notes:
- This tutorial only shows how to join as you go granny squares. I have a separate tutorial on how to crochet the classic granny square.
- The ch 3 at the beginning of each round counts as 1 dc.
- Motif refers to the granny squares.
- The first motif of each project will be made in full but all the following ones will begin the same way but on the last round, will be joined to existing motif(s).
- .The motifs are always joined with the right sides facing up so make sure both motifs are facing the same direction when joining.
Instructions:
1. Joining the first row.
1. To join the granny squares, you’ll need to work up one granny square to completion but all subsequent motifs will make use of the last round to join them to another motif(s).

2. Work as you normally would until you get to the first corner. Work 3dc and ch 1 into the corner space. This is where we’ll start the process of joining the granny squares.
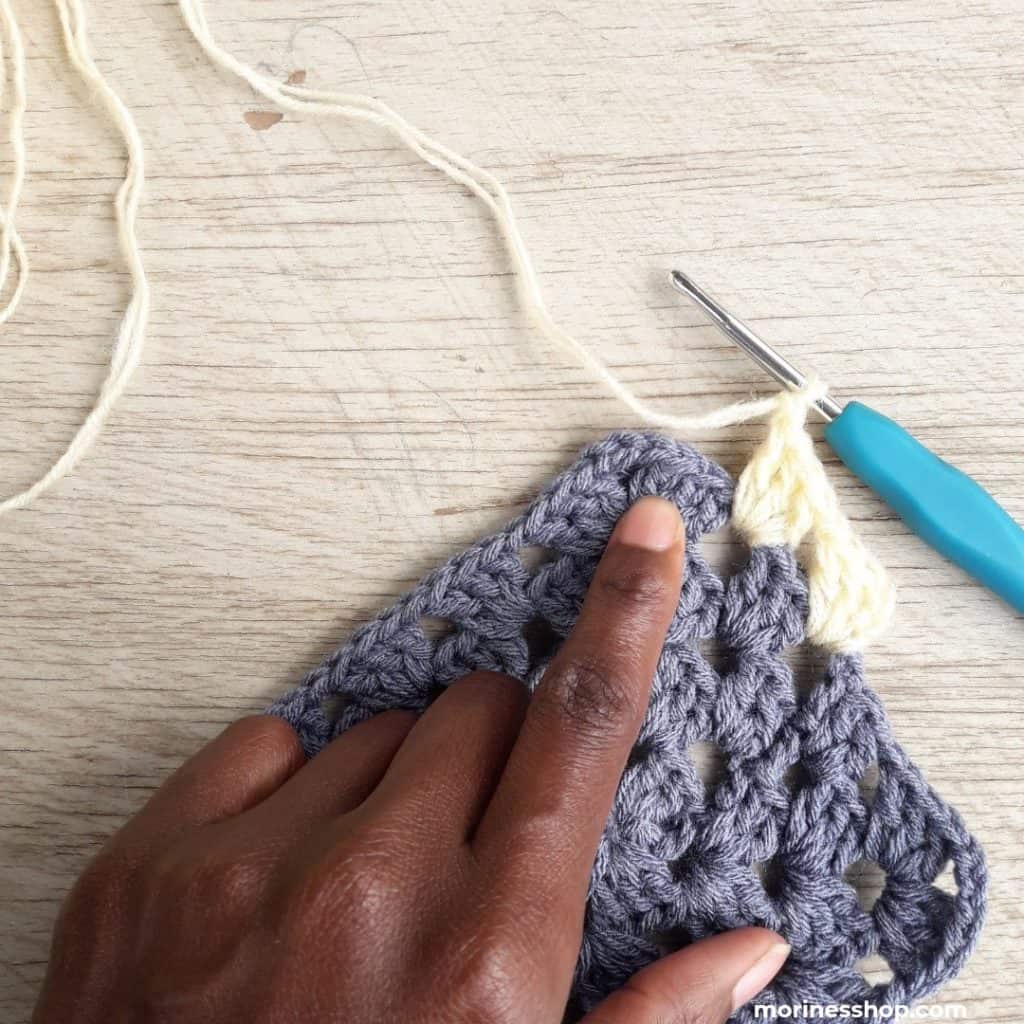

3. With your yarn still on the hook, insert it into the corner space of the adjacent square as shown below. Wrap your yarn around the hook and work a sl st, Ch 1 to secure the corner.


4. 3 dc into the corner space of the previous round.

5. Insert your hook into the ch 1 space from the adjoining square. Wrap the yarn over the hook and pull through the first square and the loop already on your hook to complete the stitch. Note: Instead of making the chain stitch, we make a joining slip stitch into the corresponding chain space of the first square.
6. Then we need to make a group of 3 dcs into the chain space of the row below on the second square, as we normally would. Make a joining sl st into the corresponding chain space of the first square, as before.

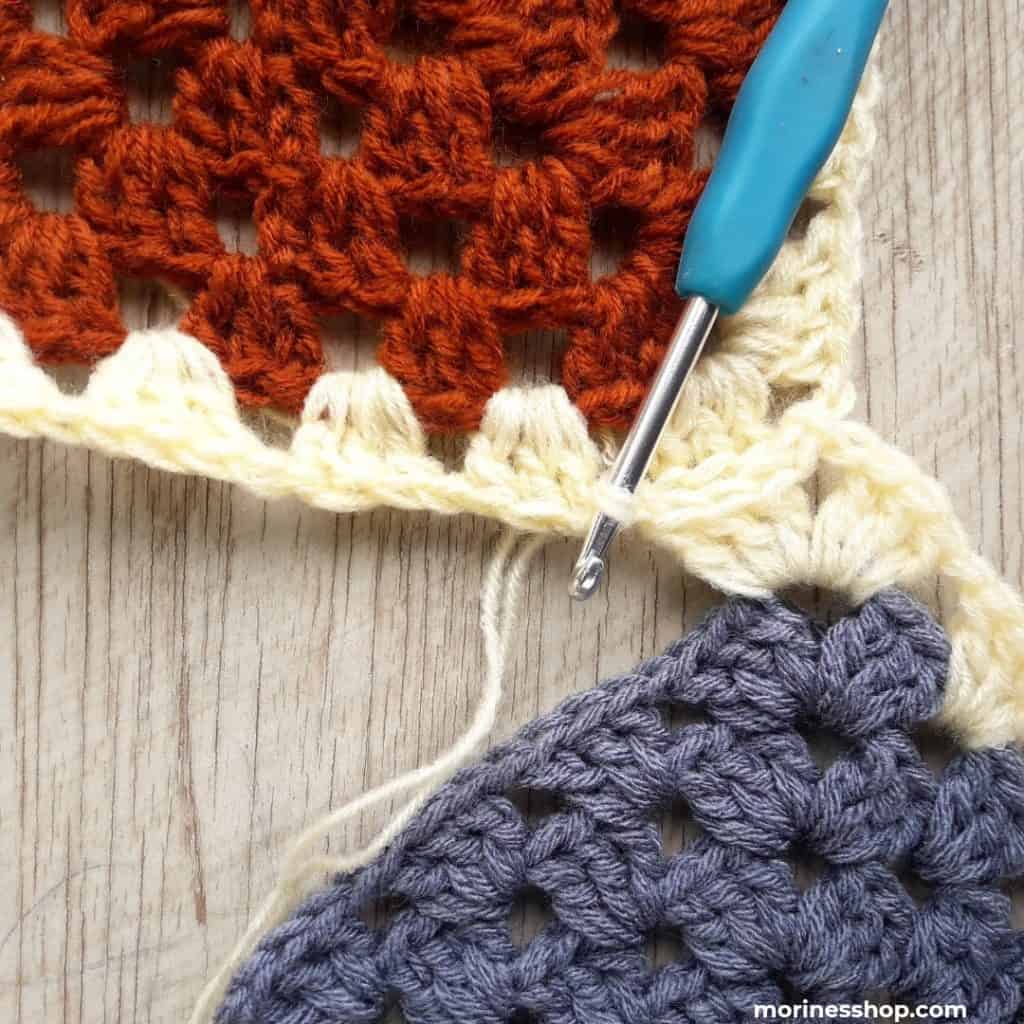
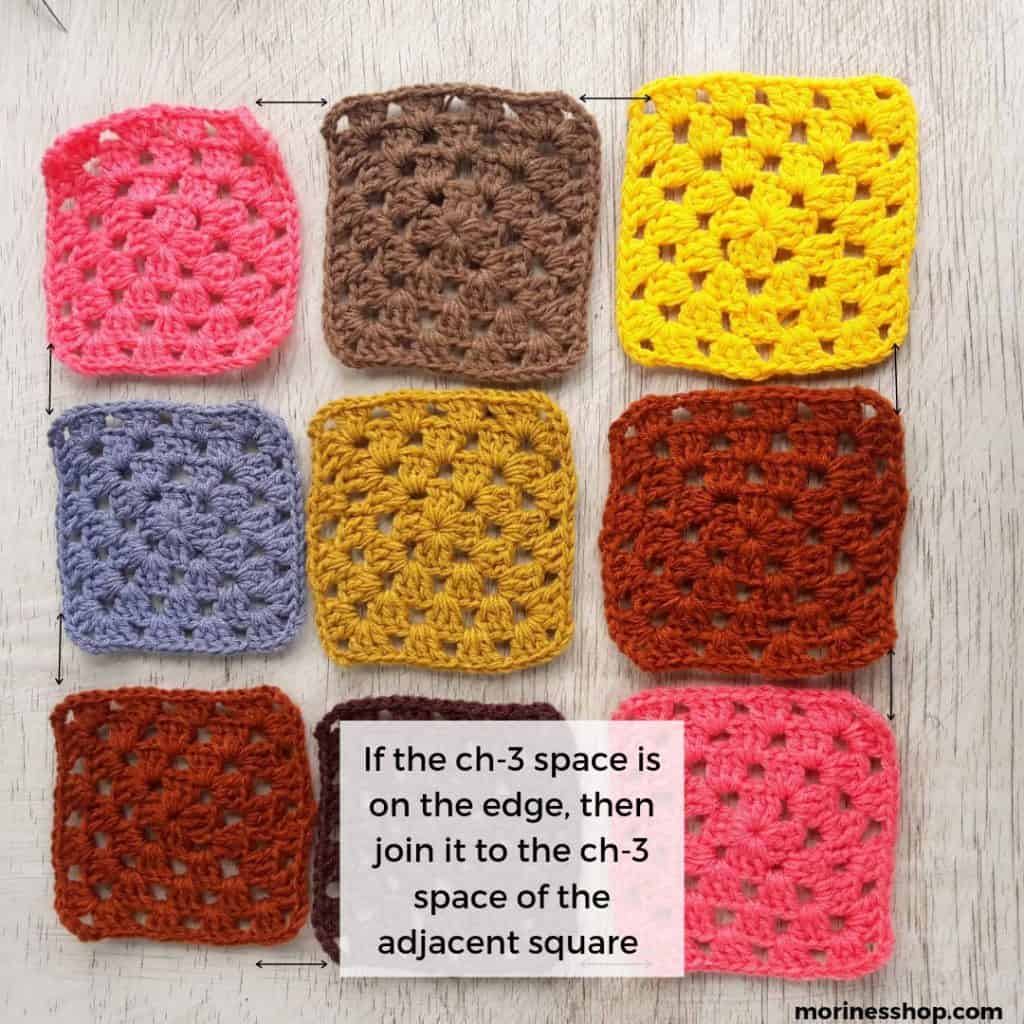
7. Continue this way until you get to the corner space. Note: All ch-3 corner spaces are joined diagonally unless they are on the edge in which case they are joined to the square adjacent to them. If there are no motifs adjacent to your your current square, simply continue working the granny square as you normally would. Repeat these steps join your row of squares.


Otherwise, continue with joining as below. where you’ll join the corners adjacent to each other.
2. Joining the second row.
Once the first row of squares is complete you are ready to work the second row. This is done in exactly the same way, but this time we will join our new square underneath our first square.
As before, work as you normally would until you get to the first corner. Work 3dc and ch 1 into the corner space.
With your yarn still on the hook, insert it into the corner space of the square diagonal to the one you’re currently working on as shown below. Wrap your yarn around the hook and work a sl st, Ch 1 to secure the corner. 3 dc into the corner space of the previous round.

Repeat the steps 5-7 from part 1 above.

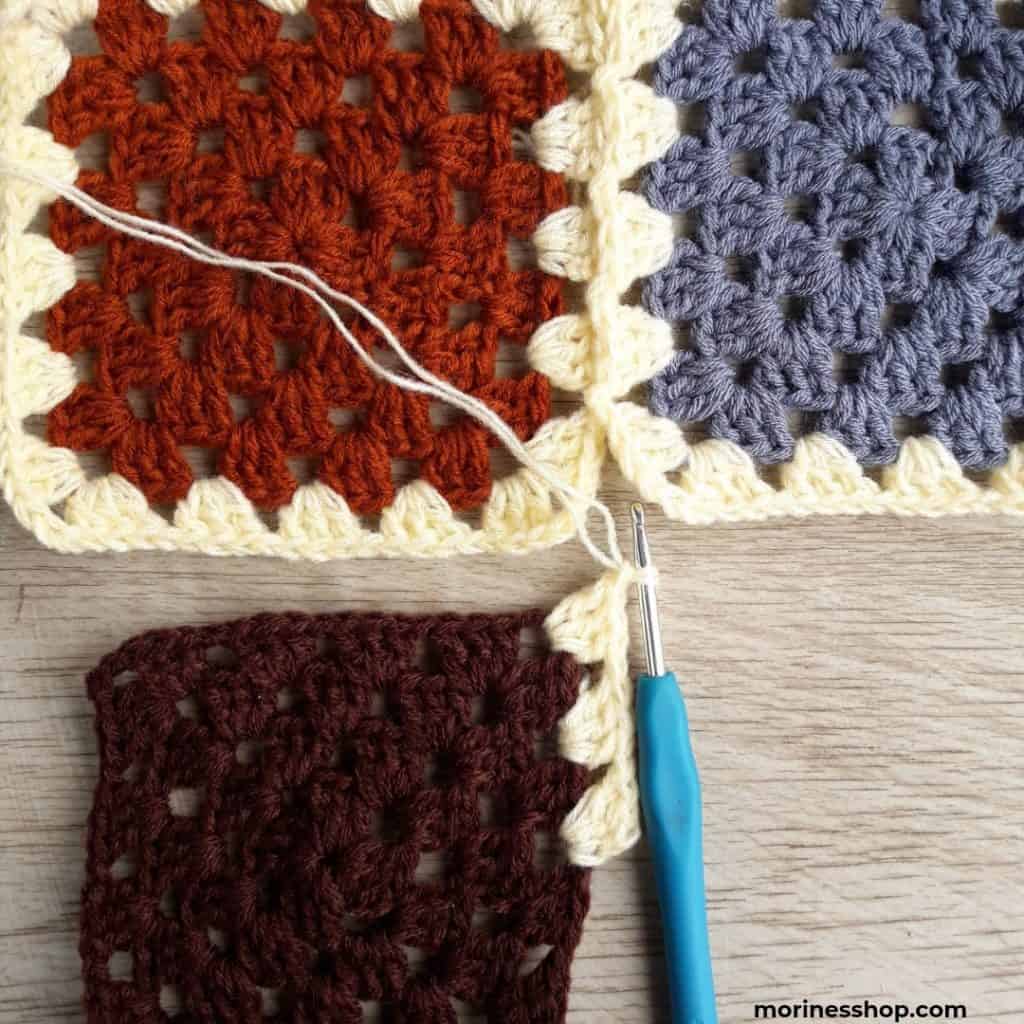
3. Joining a square on two sides.
The next square we need to add will be a little bit different because we’ll need to join along two sides.
Carry on joining this first side of the square all the way along the edge until you reach the corner space. Make the first 3 dc into the corner space of the current square in the normal way. Ch 1.

With your yarn still on the hook, insert it into the corner space of the square diagonal to the one you’re currently working on as shown below. Wrap your yarn around the hook and work a sl st, Ch 1 to secure the corner. 3 dc into the corner space of the previous round. First side join completed.


Now, for the second side join. All you need to do is work your way along this side, making joining sl sts into the ch-1 spaces of the adjacent square. Once you’ve reached the corner space, leave them unworked unless there is a square diagonal to the one you’re currently working on.

You can now go on and finish the corner and the rest of the last side of the current square.

And there you have it! The join as you go method is really my favourite. It might seem daunting but what you need to remember is:

Sharing is Caring!
