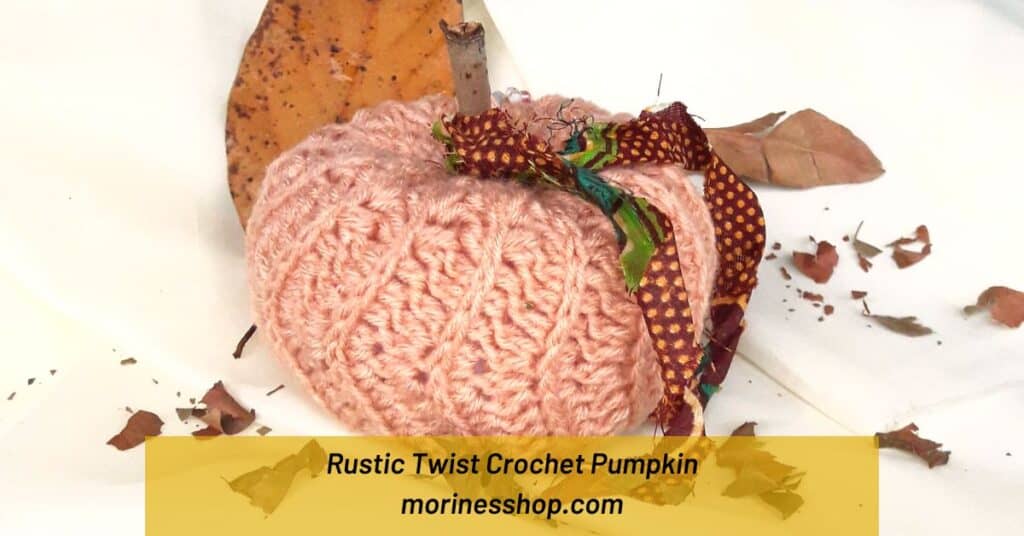
One of my favourite things to admire from other crocheters is the crochet pumpkin patterns. Every year, I pick one and have fun trying out different colour combinations. This year I decided to make one of these veggies and see how it goes. Meet the Rustic Twist Textured Crochet Pumpkin.

About this Textured Crochet Pumpkin
The Rustic Twist Pumpkin is worked in the third loop. What is the third loop in crochet? The third loop is the loop located right below the back loop. Working in the third loop only pushes the front and back loops forward and adds a lovely ridged texture to the pumpkin. This medium sized crochet pumpkin pattern is simple but unique. Furthermore, it’s easy to customize in terms of colour.
- Free pattern: Keep scrolling for the FREE tutorial or purchase the ad-free PDF
- Keep track of your progress: Add it to your Ravelry Queue
- Sharing is Caring: Pin it for later

Rustic Twist Textured Crochet Pumpkin
Materials:
- DK yarn
- 3.5 mm crochet hook
- Darning needle
- Scissors
- Stuffing
- Small twig for stem
- Piece of kitenge (ankara) fabric to accessorize
Stitches and terms used:
- Ch= chain
- Sl st= slip stitch
- Sc= single crochet
- Hdc= half double crochet
- Rpt= repeat
Gauge: 13 sts & 6 rows in dc= 4”
Finished size: 4″ across and 4″ tall (including twig)
Notes:
- Read through the pattern from beginning to end before starting your work just to be sure don’t have any questions that might cause frustration while working on the project.
- This pattern is written in US terms. For a conversion into UK terms, get my free eBook with the conversion charts here.
- Please check your gauge and adjust as needed to achieve correct sizing.
- The pattern is worked in the third loop
- Ch 1 doesn’t count as a stitch.
- Stitch count for each size remains the same throughout the pattern.
- The Rustic Twist Textured Crochet Pumpkin is worked flat in rows and seamed together when finished.
Instructions:
With your DK yarn and 3.5 mm hook, ch 25
Row 1: sc in 2nd ch from hook. sc in each of the next 3 ch, hdc2tog twice, hdc in each of the next 3 ch, 2 hdc in each of the next 2 ch. Hdc in each of the next 3 ch, hdc2tog twice, sc in in the next 3 chs, 2 sc in last ch. (24 sts)

Row 2: Ch 1, turn. 2 sc in the 1st st, sc in each of the next 3 sts, hdc2tog twice, hdc in the next 3 sts, 2 hdc in each of the next 2 sts, hdc in each of the next 3 sts, hdc2tog twice. Hdc in each of the next 3 sts, 2 hdc in the last st. (24 sts)

Row 3-30: Rpt row 2

Finishing
- To close off your piece, fold in half, ch 1, turn. (Insert your hook through the third loop and the corresponding chain st and work a sl st) across. Fasten off and leave an 8 inch tail for sewing the top closed.

- Thread your yarn end and insert your darning needle through the ch 1 bumps visible on the ridged sections.

Pull the yarn tight but leave a hole big enough to insert your twig later. After that, tie a knot and weave in your ends.

- Next, stuff the pumpkin with your stuffing through the bottom opening.
- In the same way as before, thread a piece of yarn and insert your darning needle through the ch 1 bumps visible on the ridged sections. Pull the yarn tight but don’t leave a hole this time, as this is the bottom of your textured crochet pumpkin.

- After that, tie a knot and weave in your ends.
- To create a squashed pumpkin shape, make long stitches that run vertically through the center of your pumpkin, being careful not to close the hole for the twig. Do this 4 times making a + shape. As you are doing this, pull the stitches a bit tight. Knot the yarn and weave in your ends.

- Insert your twig through the hole at the top and glue it to better secure it in place. Tie your piece of kitenge fabric around the twig and you have yourself a cute Rustic Twist Pumpkin!


Your pumpkin Is cute, unique and works up quick ly, and your instructions are excellent. Thank you for sharing.
You’re welcome! I’m so glad you like it.
I am just seeing your site for the 1st time and I love it! I am going to try this and make several of your patterns. I’m going to make the Pumpkin 🎃 Thank you for the patterns. Ps your pretty and have a blessed day:)
Hi Pixie. Nice to have you here! I hope you enjoy making the crochet items and please share photos if you can. Thank you and have a blessed day too.