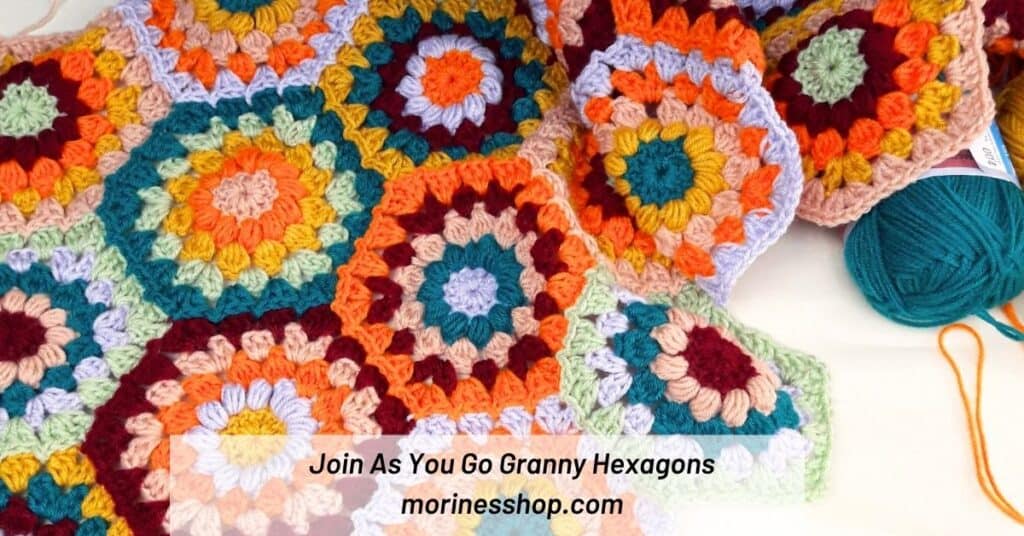
Join as you go method is one of my favourite ways of joining motifs. I have made a tutorial on how to join as you go granny squares and join as you go for solid hexagons. In this post, I’m going to teach you how to join as you go granny hexagons.
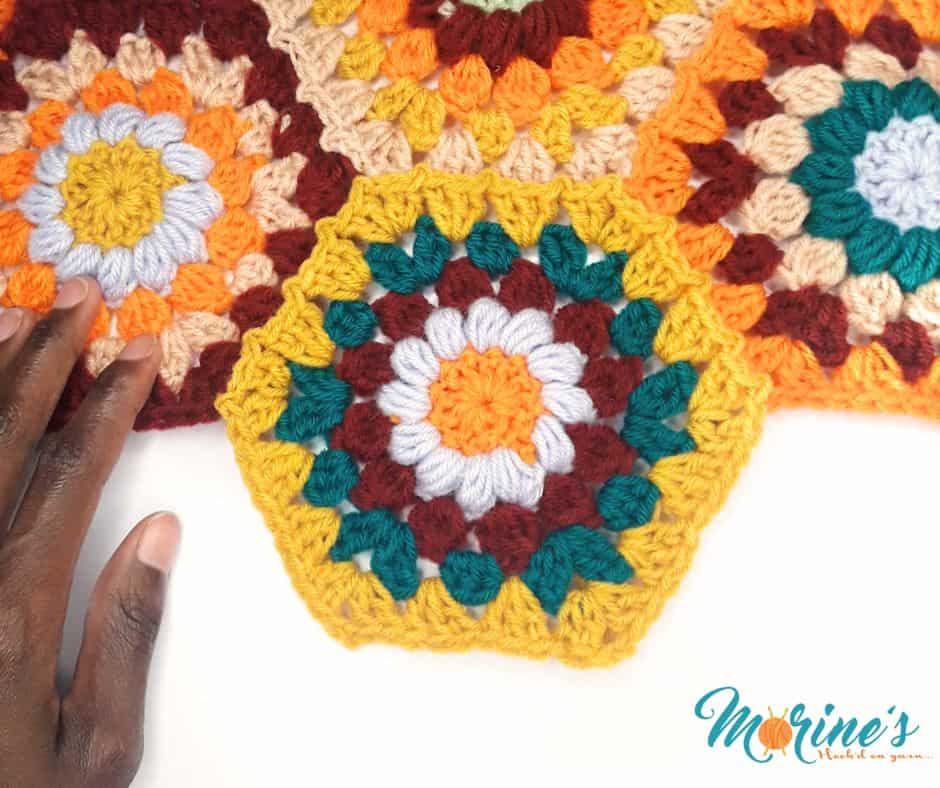
Get all the crochet sunburst goodness
- Keep scrolling for the tutorial on how to join as you go granny hexagons.
- You can also get the tutorial for the motifs used here in crochet the sunburst granny hexagon and another one on how to crochet a half granny square hexagon; which are perfect for filling in the deep valleys left over after crocheting your sunburst granny hexagon.
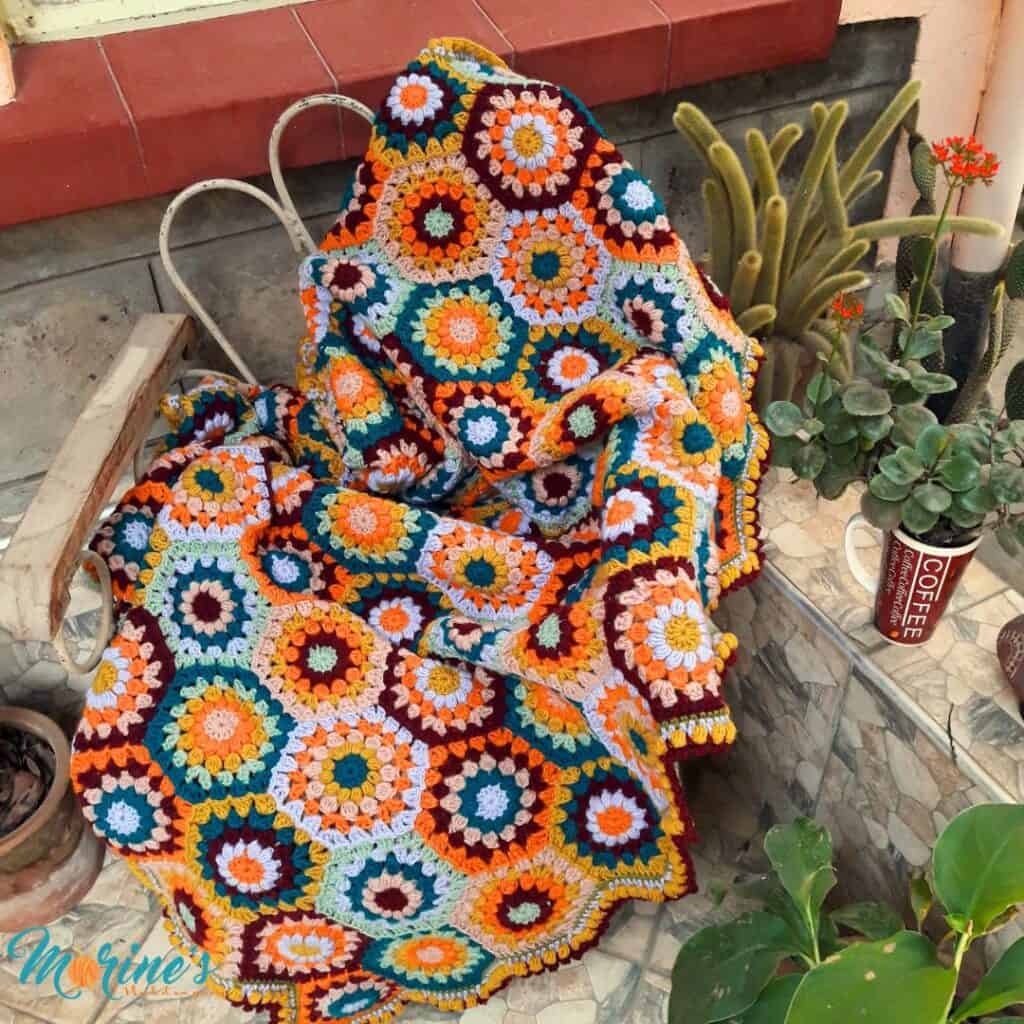
- Find the complete Flowers in Bloom Blanket pattern or purchase the ad-free PDF
- Sharing is caring; pin this post for later

Join as you go for granny hexagons
Materials:
- Yarn
- Hook
- Scissors
- Darning needle
Stitches and terms used:
- Ch= chain
- Sl st= slip stitch
- Dc= double crochet
- Rnd= round
- Rpt= repeat
Notes:
- This tutorial only shows how to join as you go for granny hexagons. I have a separate tutorial on how to crochet a granny hexagon and another one on how to crochet a half granny hexagon.
- The ch 3 at the beginning of each round counts as 1 dc.
- Motif refers to the hexagon
- The first motif of each project will be made in full but all the following ones will begin the same way but on the last round, will be joined to existing motif(s).
- .The motifs are always joined with the right sides facing up so make sure both motifs are facing the same direction when joining.
- This tutorial on the join as you go granny hexagons shows illustrates joining on 3 sides. Others will be joined on 1, 2, 3 or even 4 sides all depending on the placement of the current hexagon.
Instructions.
a.) Joining to the first motif: –
1. To join the hexagons together, you’ll need to work up one hexagon to completion but all subsequent hexagons will make use of the last round to join them to another hexagon(s). Crochet the 1st 4 rnds to completion.
2. Work the 5th rnd as you normally would until you get to the 2nd corner. You can however choose to start joining from the 1st corner.
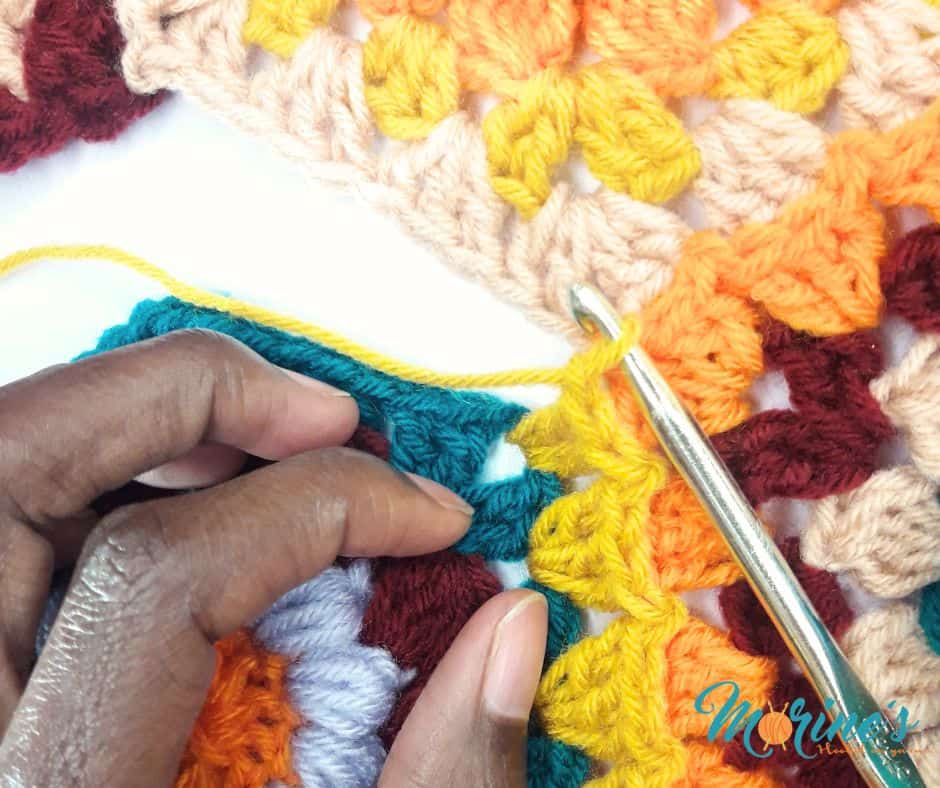
3. 2 dc in the ch 2 sp, ch 1. This is where we’ll start the process of joining the hexagons.

4. With your yarn still on the hook, insert it through the ch 2 sp of the hexagon you want to attach the current motif to as shown below.

5. Wrap your yarn around the hook and work a sl st, ch 1 to secure the corner.

6. 2 dc in corner space of current motif. Insert your hook into the ch 1 space from the adjoining motif. Wrap the yarn over the hook and pull through the adjoining motif and the loop already on your hook to complete the stitch.

7. Then we need to make a group of 3 dcs into the next space of the current motif, as we normally would. Make a joining sl st into the corresponding space of the adjoining motif, as before.

8. Repeat step 7 until you get to the corner space

If there are no motifs adjacent to your current motif, simply continue working the hexagon as you normally would. Otherwise, continue with joining as below.
b.) Joining to the second motif:-
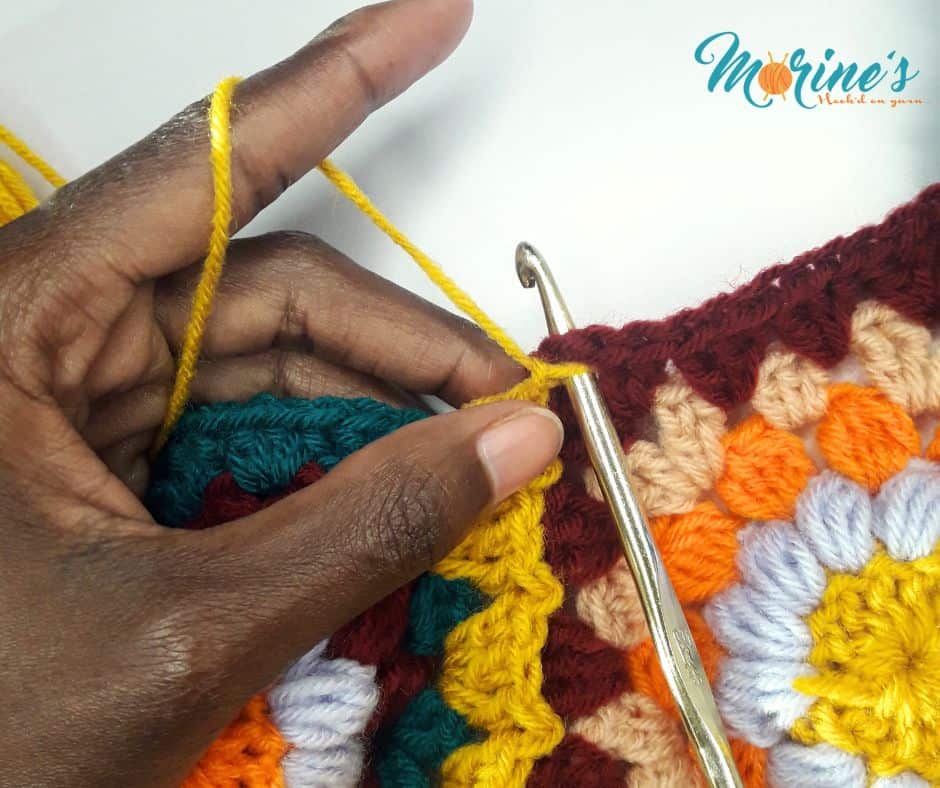
9. As before, work 2dc and ch 1 in corner space.
10. Insert it through the stitch shown in the picture below and ch 1.


11. From here repeat step 6-8 above


c.) Joining to the third motif:-
12. The joins are basically a repeat of steps 6-8. The picture below show I joined in my third motif.

If there are NO adjacent motifs on the side, simply continue working the hexagon as you normally would.

If there is still a motif to join in, simply repeat steps 6-8 until there are no more motifs on the side. From here, simply continue working the hexagon as you normally would and fasten off when done.
Do you have any instructions for join as you go for the half granny, and instructions for a border? Is there a photo for the completed afghan?
Morning Ariella. You can get the details on this blog post: https://www.morinesshop.com/flowers-in-bloom-crochet-hexagon-blanket/