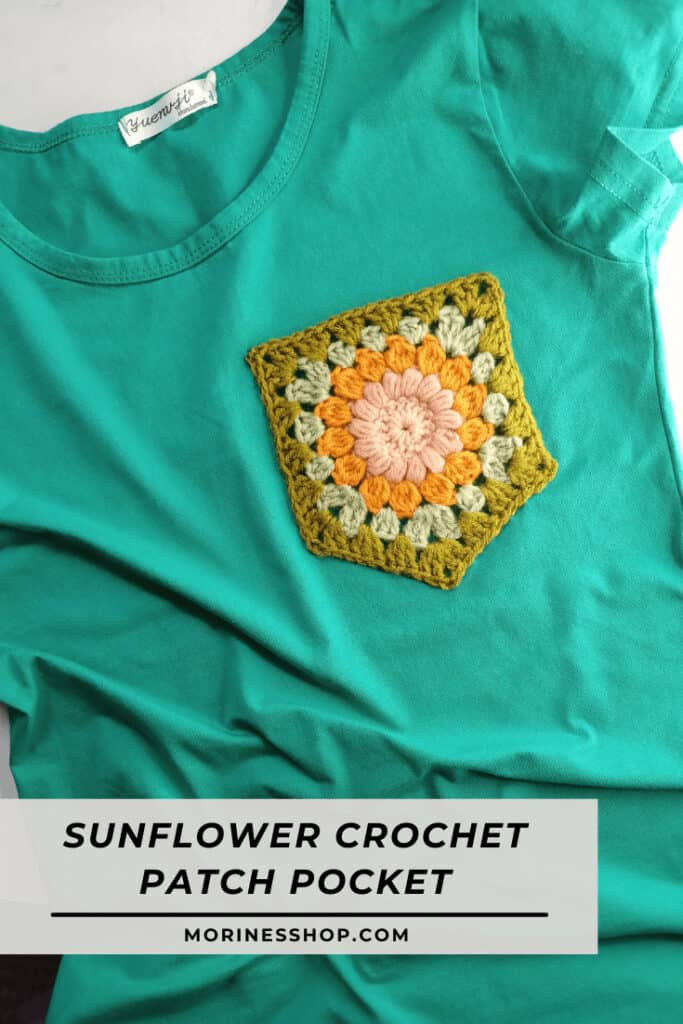
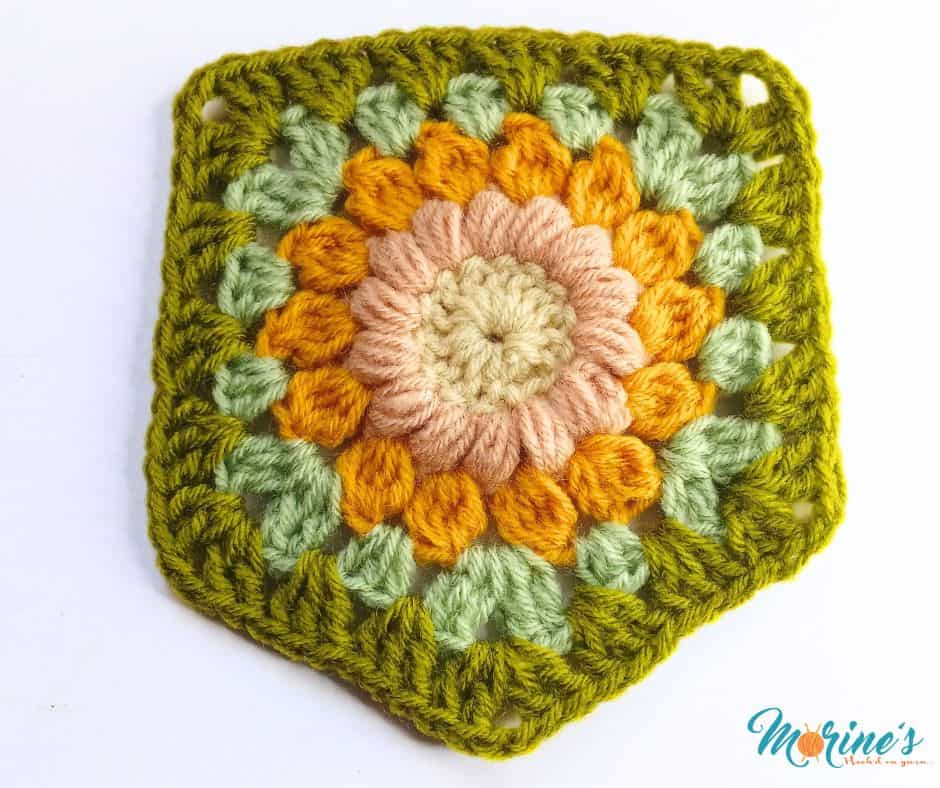
The Sunflower Crochet Pocket is a lovely patch that you can use to spruce up your garments, as an accessory or even to hide stains! The uses are endless.
The Patch pocket uses a variation of the Sunflower Granny Square. Here are other patterns that use similar variations:
Get the Sunflower Crochet Pocket
- Pattern: Keep scrolling for the FREE version of this crochet pattern or purchase the ad-free PDF. Watch the video below that walks you through the pattern.
- Keep track of this project by adding it to your Ravelry Queue
- Sharing is Caring: Pin this post for later
About this Crochet Pocket Patch
I got this wonderful green T-shirt a while back but the tiny brand name that it has on the left side always throws me off. I’ve had it in my closet for a while so when I came across it as I was rearranging my clothes, I decided to do something about the branding.
Taking it off wouldn’t work so I decided to make an applique for it and a crochet pocket is perfect. Of course I had to fall back on the ever-loved and versatile granny squares and the Sunflower Granny Square won this round. It complements the green T-shirt well. However, you can use almost any type of granny square for a pocket patch whether it’s the Classic Granny Square or something unique like the Eye Granny Square, Circle Granny Square or the Diamond Granny Square. Simply crochet and attach.
Sunflower Crochet Pocket
Materials:
You can use one colour or multiple. For this pattern I used:
- 30 yards total of DK yarn in:
- Colour 1 (Off white)
- Colour 2 (Dusty rose)
- Colour 3 (Mustard)
- Colour 4 (Mint)
- Colour 5 (Olive)
- 3.5 mm crochet hook
- Scissors
- Darning needle
- Pins
- Sewing needle and thread
Stitches and terms used:
- Ch= chain
- Sl st= slip stitch
- Sc= single crochet
- Hdc= half double crochet
- Dc= double crochet
- “= inch(es)
- St(s)= stitch(es)
- Sp(s)= space(s)
- C1, C2, C3, C4 & C5 = Colour 1, Colour 2, Colour 3, Colour 4 and Colour 5
Size: With the yarn and hook specified Sunflower Crochet Pocket measures approximately 4.5” across and 5.5” from top to bottom at the longest point
Yarn alternatives: Any DK, #3 or 8 ply yarn
Gauge: Using DK yarn and 3.5 mm crochet hook, 9 sts & 9 rows in sc = 2” x 2”
Notes:
- Read through the pattern before starting your work just to be sure you don’t have any questions that might cause frustration while working on the project.
- This pattern is written in US terms. For a conversion into UK terms, get my free eBook with the conversion charts here.
- The pattern is worked in joined rounds.
- Repeating sections within the rounds are shown in round () brackets followed by the number of times they are repeated e.g. (Dc in next st, 2 dc in next st) 11 times means the sequence in the brackets must be repeated a total of 11 times.
- Stitch totals are shown in square [] brackets at the end of each round e.g. [12] means you should have a total of 12 stitches at the end of the round.
- This pattern uses puff and bobble stitches. For a detailed tutorial on the same, visit my blog post on how to crochet puff and bobble stitches.
Pattern:
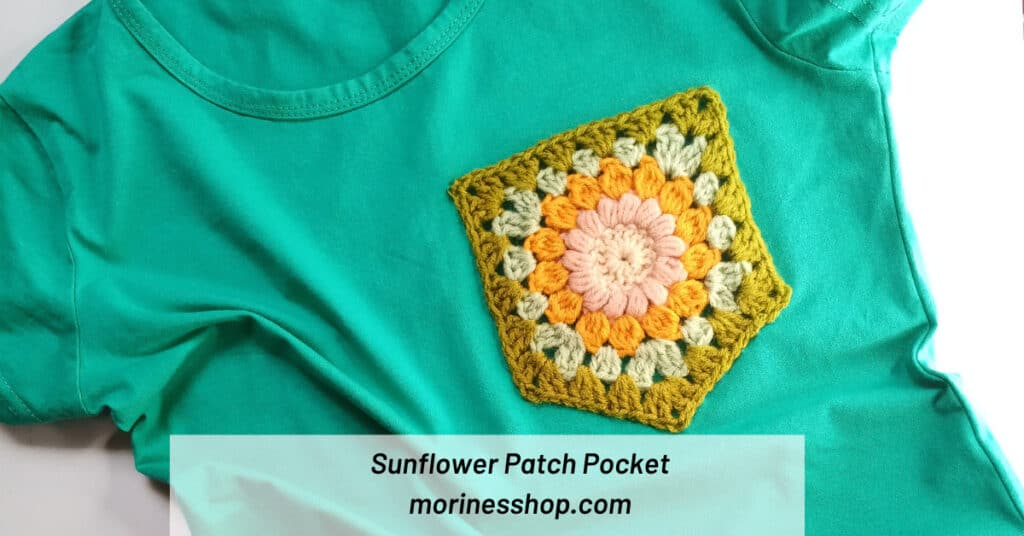
Using C1 and 3.5 mm crochet hook, ch 4. Join with a sl st to the first ch to form a ring.
Rnd 1: Ch 3 (counts as first dc), make 13 dc into the ring. Join with a sl st to the third ch of beg ch 3. Fasten off C1. [14]
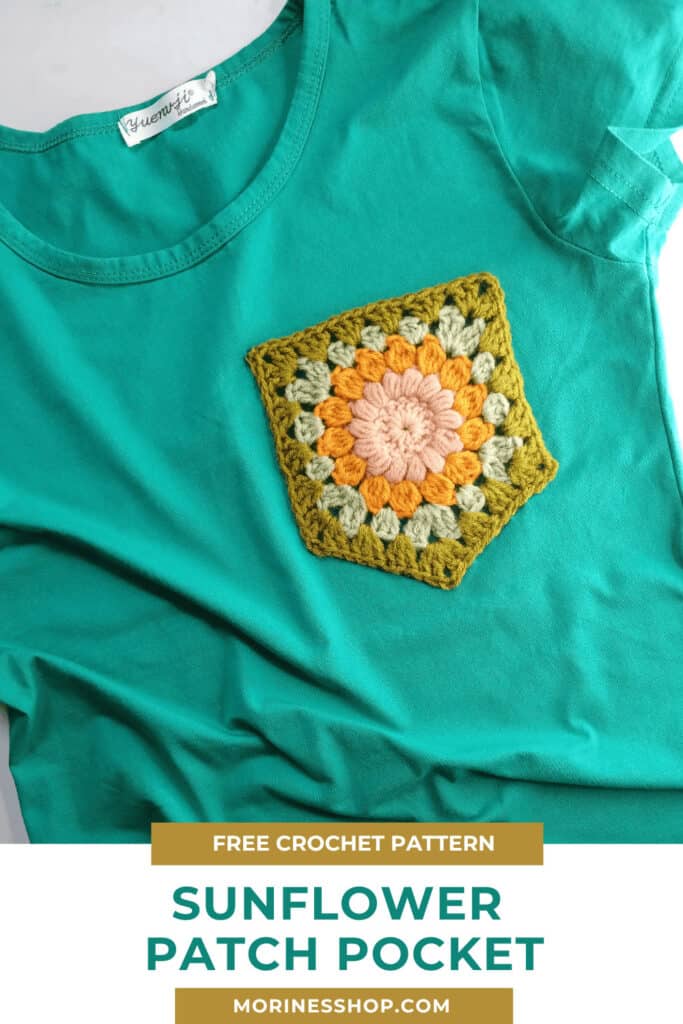
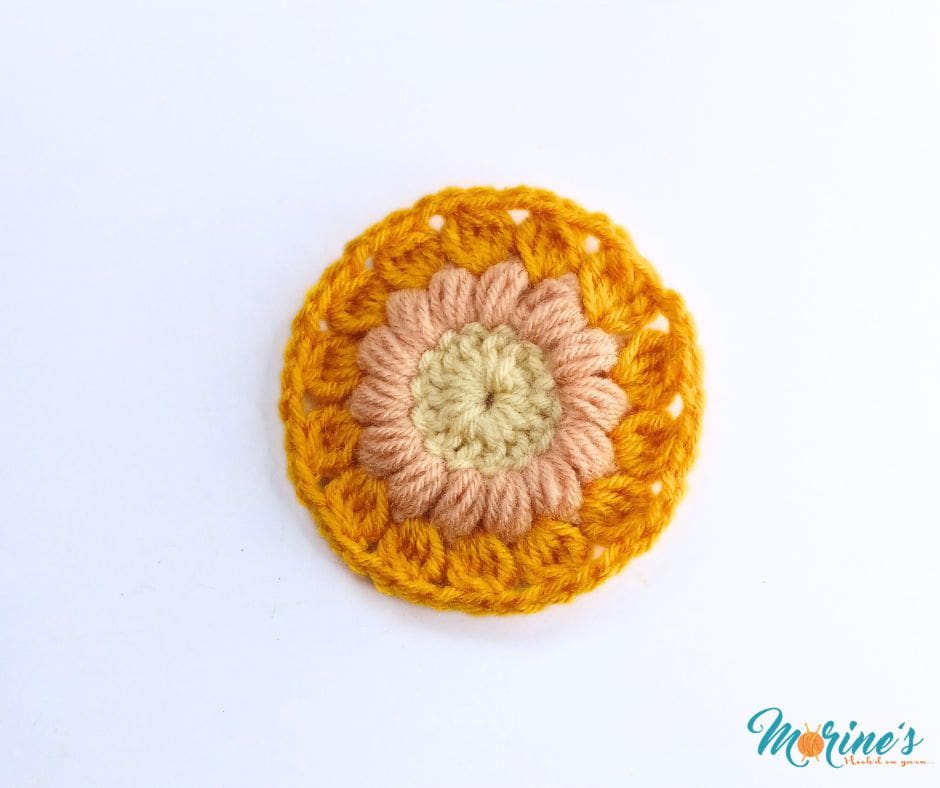
Rnd 2: Join C2 into any st from Rnd 1 and ch 2. ((Yarn over, insert the hook into the stitch, yarn over, pull up a loop) 3 times. There will be 7 loops on the hook. Yarn over, and draw the hook through all loops on hook. Ch 1) Continue to make puff stitches in all the stitches in the previous rnd. as indicated in the bold brackets (). Join with a sl st to the top of the first stitch. Fasten off C2. [14]
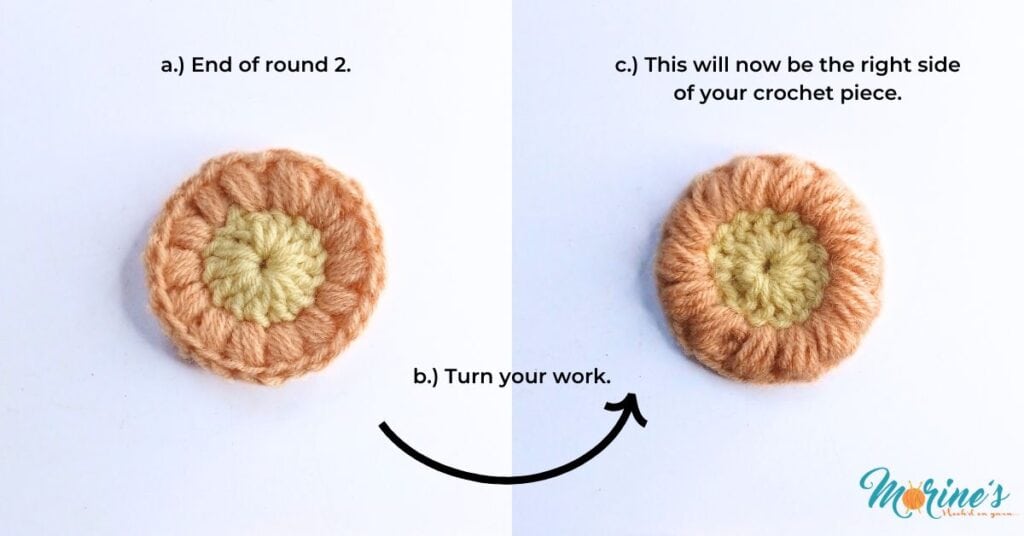
Rnd 3: Turn your work so that the wrong side becomes the new right side. After that, you will work your bobbles in the ch-1 spaces from the previous round.
Join C3 into any ch-1 space from round 2 and ch 2. (Yarn over, insert the hook into the stitch, yarn over, pull up a loop, yarn over, draw through 2 loops on hook) 3 times. (There will be 4 loops on hook.) Yarn over, draw through all remaining loops on hook. Ch 2
For the remaining spaces, you will work the bobble as follows: Yarn over, insert the hook into the stitch, yarn over, pull up a loop, yarn over, draw through 2 loops on hook) 4 times. (There will be 5 loops on hook.) Yarn over, draw through all remaining loops on hook. Ch 2. [14 bobbles]
Pin it Now, Make it Later!
Rnd 4: Join C4 in any ch-2 space from the previous round. Ch 4 (counts as 1st tr). 1 tr, ch 2, 2 tr in same space; corner made.
- 2hdc in each of the next 2 spaces, (3 tr, ch 2, 3 tr) in the next space.
- 3hdc in each of the next 3 spaces, (3 tr, ch 2, 3 tr) in the next space.
- 2hdc in each of the next 2 spaces, (3 tr, ch 2, 3 tr) in the next space.
- hdc in the next space, (3 tr, ch 2, 3 tr) in the next space. Hdc in the last space
- Join with a sl st to the 4th ch of beginning ch 4. [14]
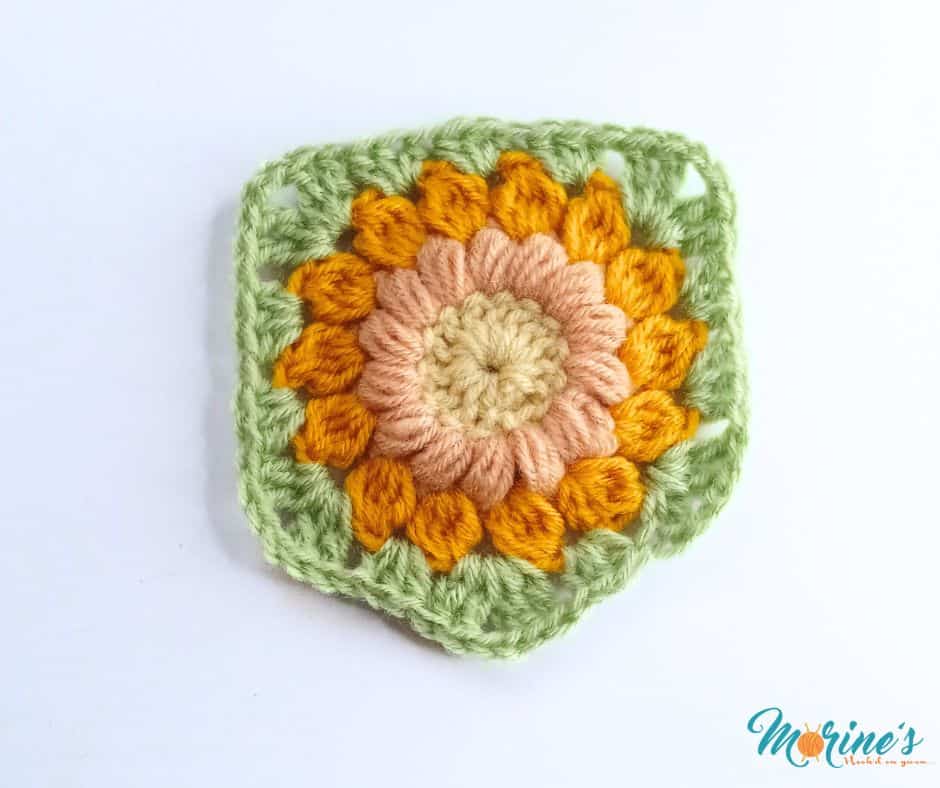
Rnd 5: Join C5 in any ch-2 space from the previous round. Ch 3 (counts as 1st dc). 1 dc, ch 2, 2 dc in same space. 1st corner made.
- 3 dc in each of the next 3 spaces. (2 dc, ch 2, 2 dc) in the next space. 2nd corner made
- 3 dc in each of the next 4 spaces. (2 dc, ch 2, 2 dc) in the next space. 3rd corner made
- 3 dc in each of the next 3 spaces. 2 dc, ch 2, 2 dc) in the next space. 4th corner made
- 3 dc in each of the next 2 spaces. 2 dc, ch 2, 2 dc) in the next space. 5th corner made
- 3 dc in each of the next 2 spaces. and join with a sl st to the beginning ch-3. [62]
Attaching the Patch Pocket:
- Block your crochet patch pocket.
- Use pins to secure it to where you will sew it. Thread your needle with thread matching the last round of your pocket patch. If you don’t have matching thread, first cut about 6-10” of the yarn you used to crochet your last round. Unwind the piece and use that as your string.
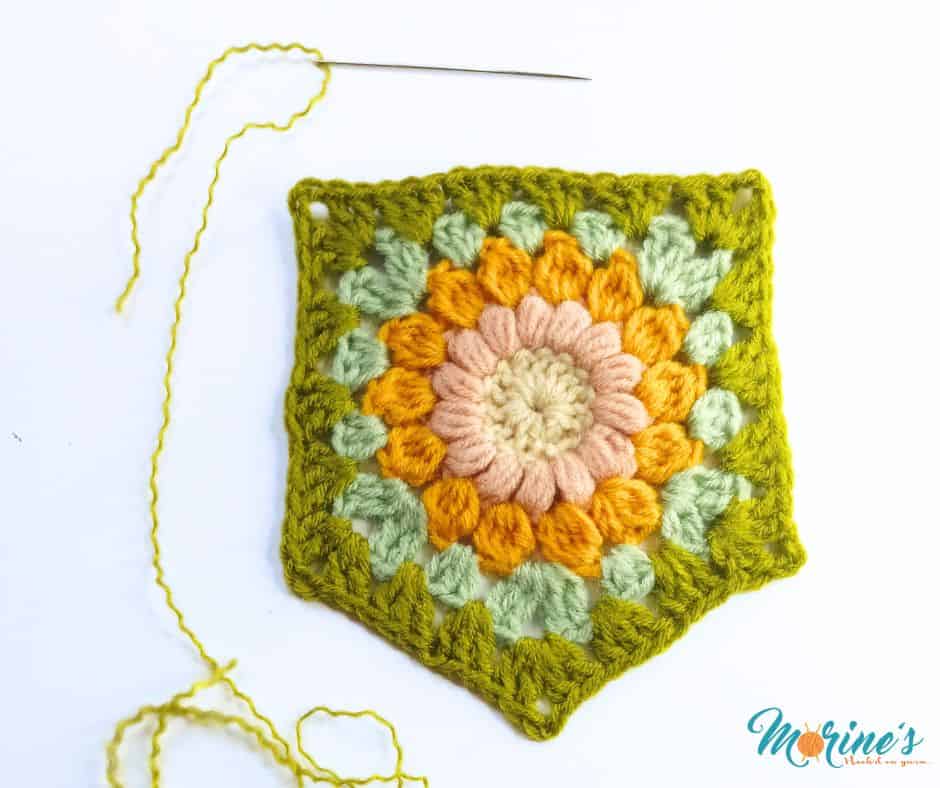
- Lastly, sew the pocket and place. Make sure the stitches you used to sew it are hidden for a neat and clean finish.

On the fourth row there should be three hdc, corner and three hdc. Not one hdc, corner then one hdc.
Hello Tammy. The 3 hdc only occurs on the top edge of the patch pocket. Each side has 2 hdc, and the bottom edges, which I believe you’re referencing, each have 1 hdc between the corners. The attached picture should help clarify this. Do you see it?
This is honestly such a bright and clever way to customize a wardrobe! I featured your sunflower patch pocket on Crafts on Display, I hope you enjoy it. https://craftsondisplay.com/crochet/crochet-patch-pocket-pattern-245376/
That’s so kind of you, thank you for sharing it there!