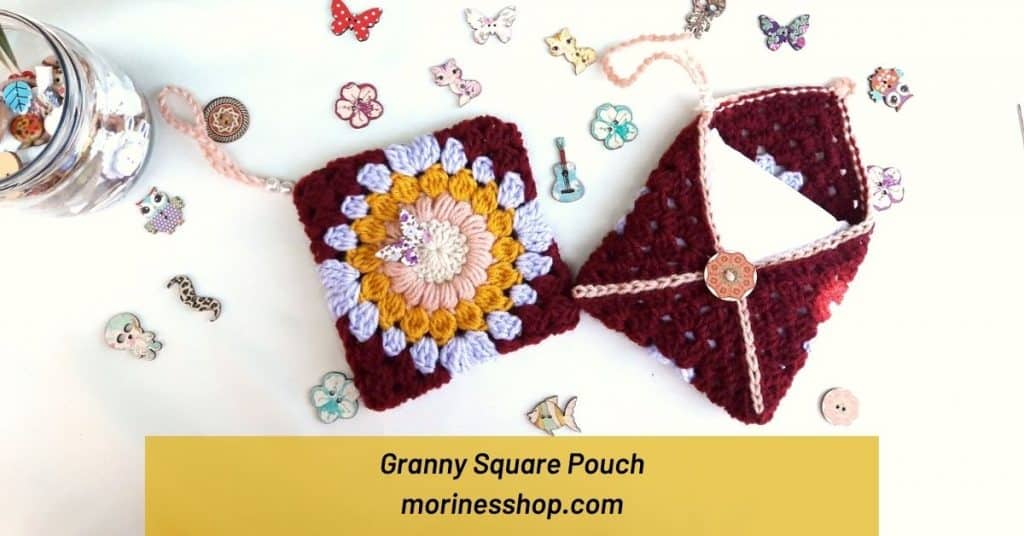
Today, I’m going to be sharing with you a granny square pouch pattern. Not only that, I’m also going to teach you how to turn your granny square into a pouch.
A crochet pouch is such an awesome idea with so many uses. You can take it with you when you are traveling or going out, you can use it as a gift pouch for jewelry, cosmetics or money. Basically any item can be stored in this very cute and very easy crochet pouch.
- Keep scrolling for the FREE version of this crochet pattern
- Add it to your Ravelry Queue
- Sharing is Caring! Pin this post for later

About this granny square pouch
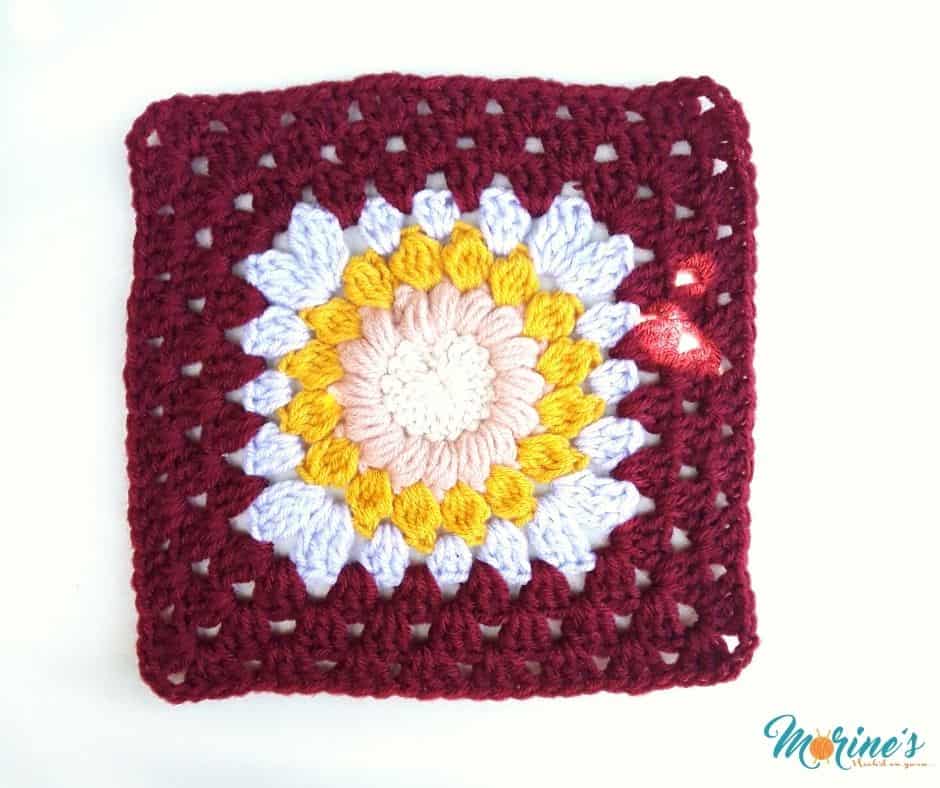
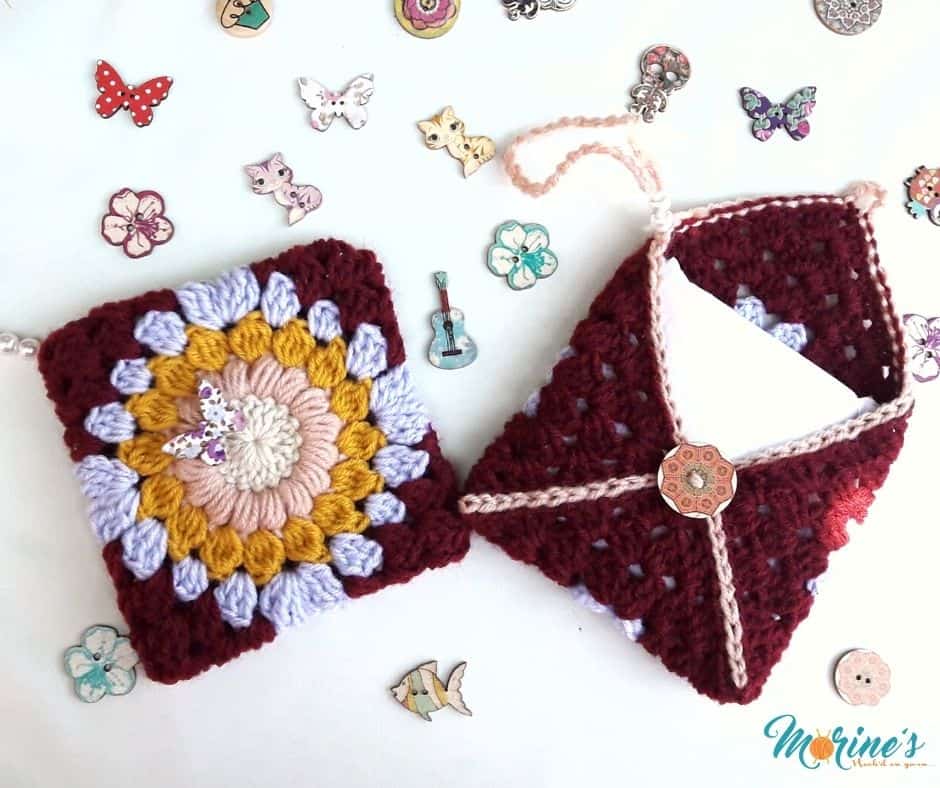
My granny square pouch will be made into a period pouch for donation. For this tutorial, I am using a bigger version of my Sunflower Granny Square pattern. However, you can use any size or patterned square you like. I walk you through how to adjust the pouch pattern to accommodate different square sizes.
Granny Square Pouch pattern
Skill level: Beginner
Materials:
- Yarn. I used approximately 40 yards DK weight yarn in 5 colours.
- Corresponding hook. I used 4 mm crochet hook
- One 1″ button
- Darning needle
- Scissors
- 2 small beads for strap (optional)
Stitches and terms used:
- Ch= chain
- Sl st= slip stitch
- Hdc= half double crochet
- Dc= double crochet
Gauge: Using DK yarn and 4 mm crochet hook, 14 stitches and 7 rows= 4 inches in double crochet
Finished measurements: The specific pouch pictured measures approximately 4.5 inches. You can however use this pattern to make your pouch any size you like.
Instructions:
Step 1: Making your granny square
Use your favourite method to make your granny square with as many rounds as you like. For a period pouch, a 7-8 inch granny square is ideal. The number of rounds will depend on the yarn weight and hook you’re using. The larger your granny square the larger your pouch will be and vise versa.
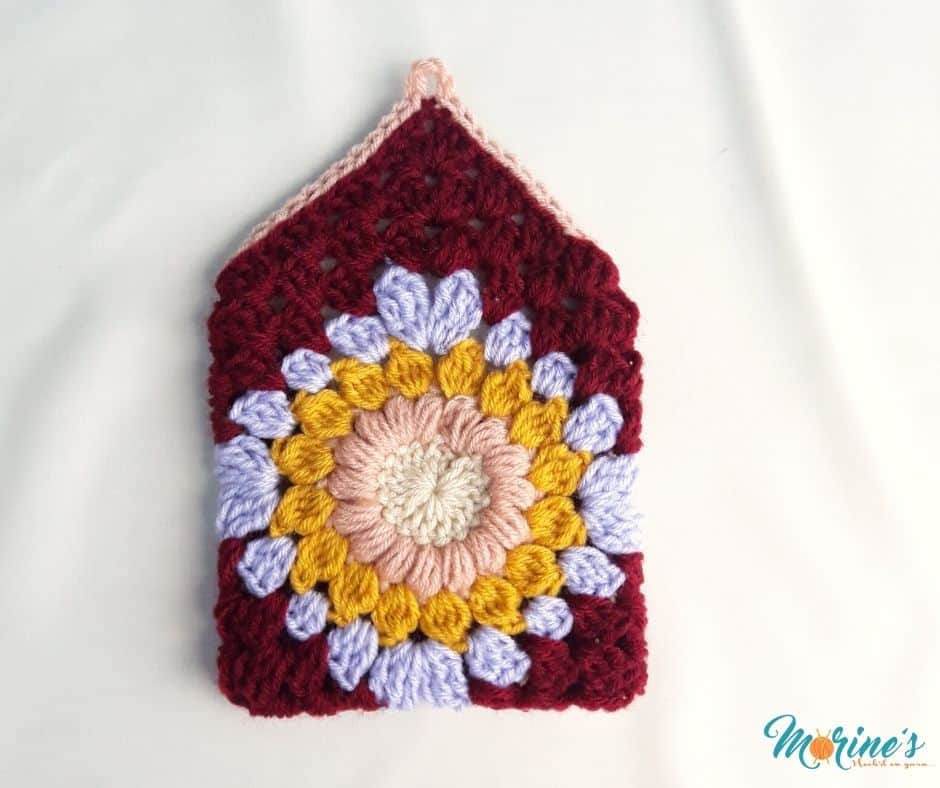
For example, I made my granny square with the sunflower granny square pattern using DK yarn from my stash and 4 mm hook.
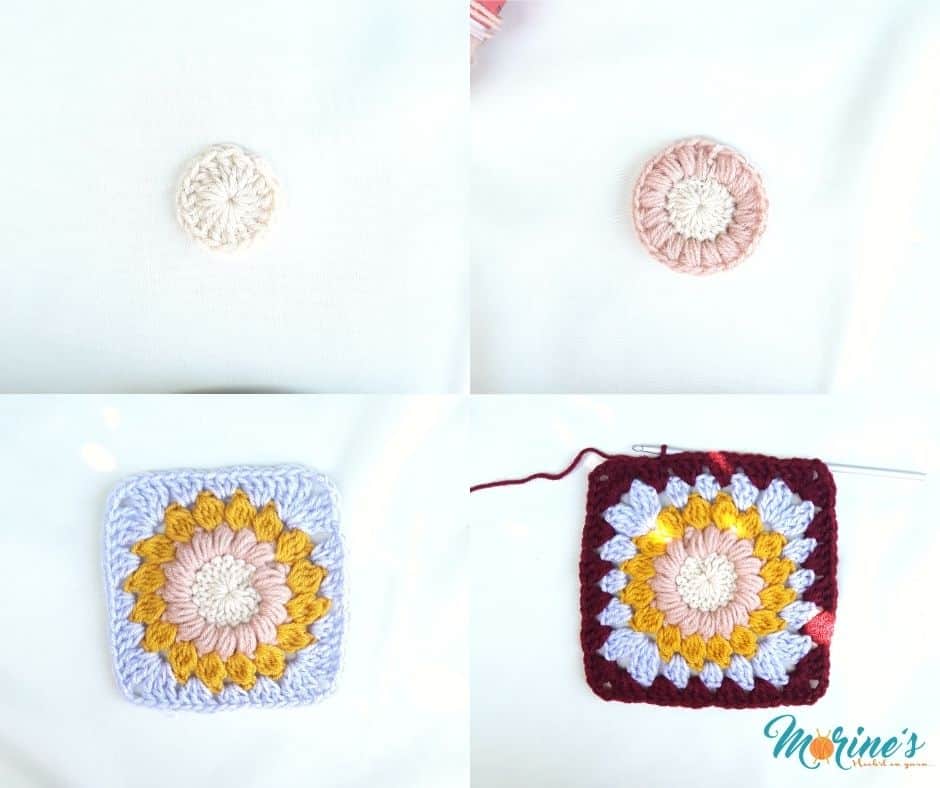
I continued with the pattern for a total of 7 rounds. That gave me an approximately 7 inch square. I arranged the colours as below.
Round:
- Cream
- Dusty rose
- Mustard
- Periwinkle
- Burgundy
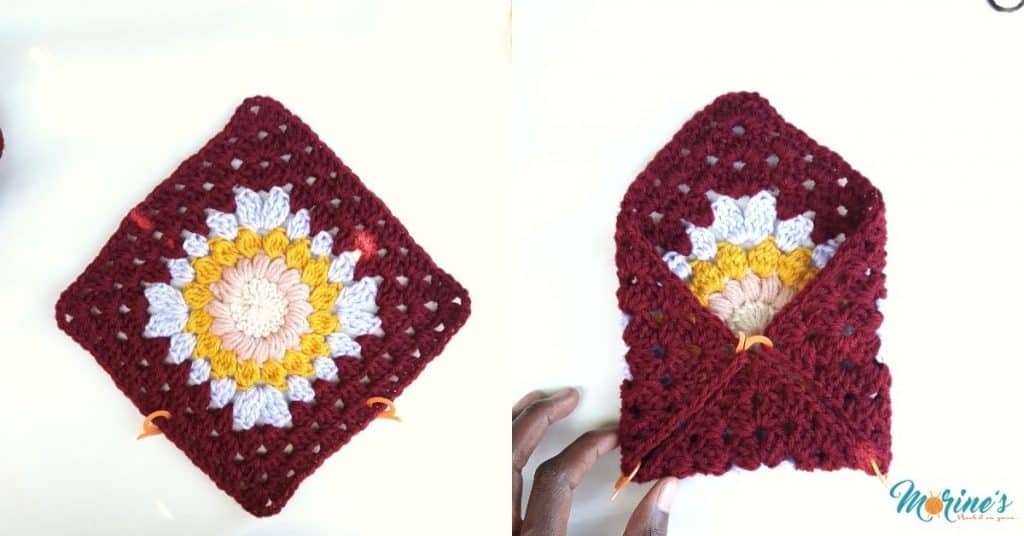
Step 2: Assemble your pouch.
To assemble your pouch, first lay your square with the wrong side facing you. Secondly, mark out the middle stitch(es) in two adjacent edges of your square using stitch markers. Thirdly, fold the corner at the bottom towards the center. Fold the corners on the right and left towards the center as well and use a stitch marker to hold them in place. The corner left unfolded will become the flap.
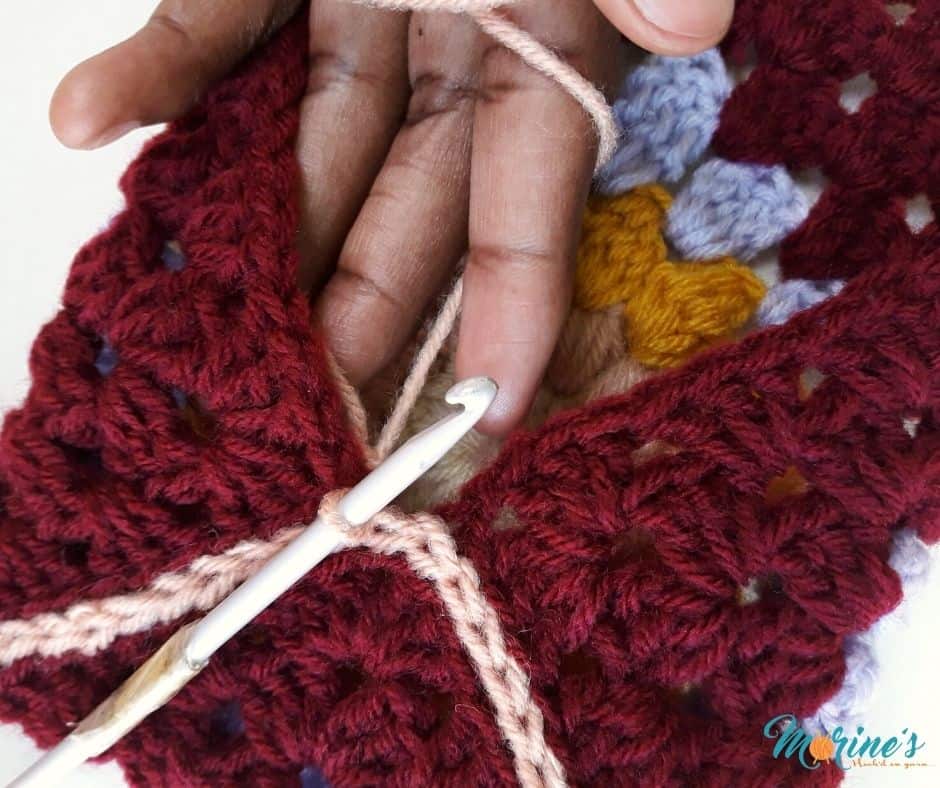
After this, insert your hook through the back loops of the 2 stitches that you marked with a stitch marker in the bottom right corner. If your square has an odd number of stitches per side, slip stitch in the middle stitch then join the remaining pairs of sts as shown below.
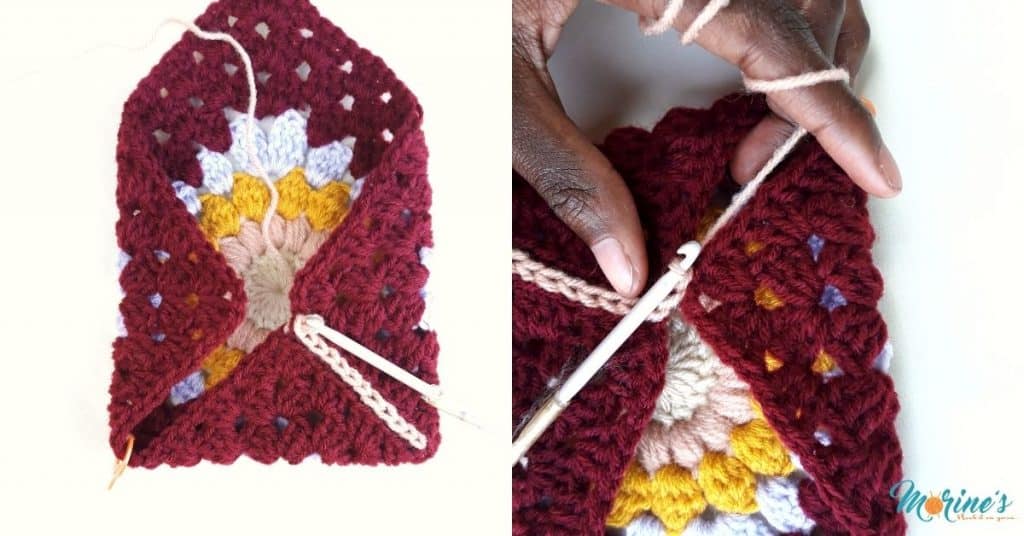
Continue working slip stitches all the way to the bottom left corner. Fasten off and weave in your ends.
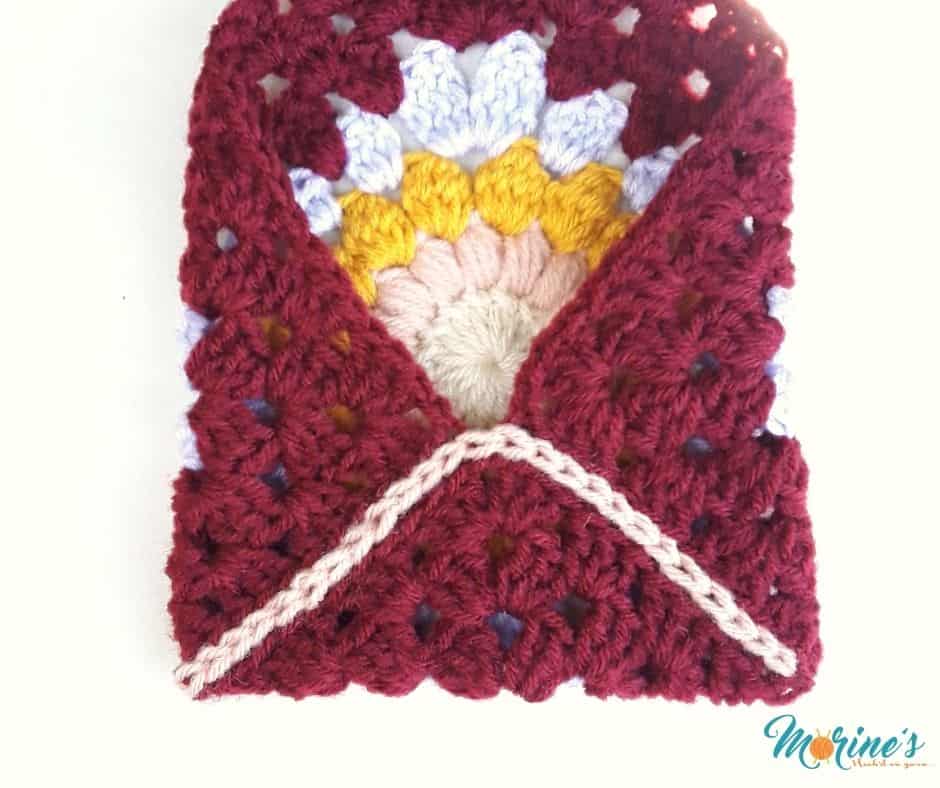
Step 3: Finishing the flap.
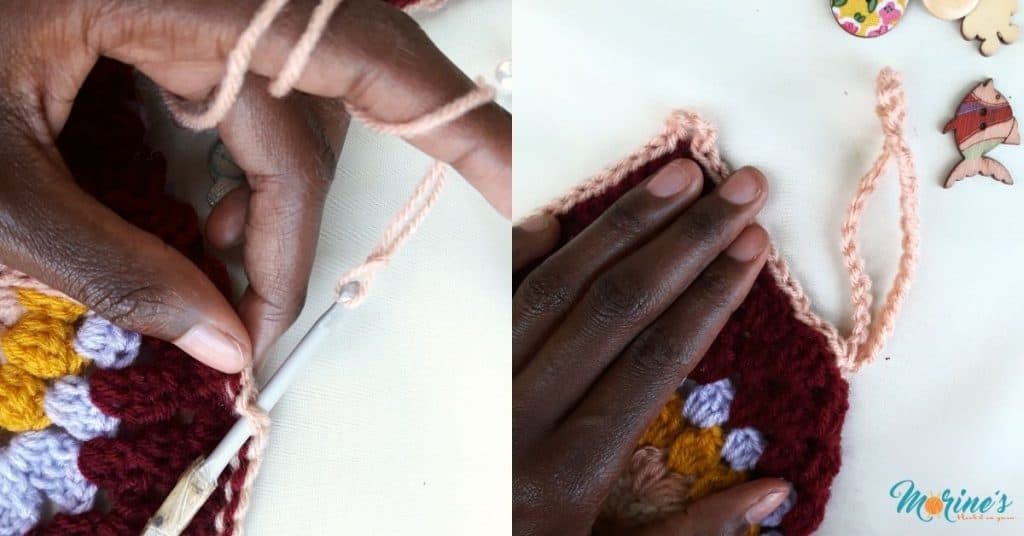
With a slip knot on your hook, insert your hook through the back loop of the corner stitch in the join on the left of the center flap.
Slip stitch in the back loop of the next stitch and in each stitch across to the top corner of the flap. Now going to make the loop for the button hole. You will need to make this the right size for your button so make the loop then test it. I used a 1″ button so I chained 6 for my button hole. Continue slip stitching on the remaining side until you get back to the first stitch. Fasten off.
Position the button and after making sure it’s in the right spot, sew it onto the center of the bottom flap.
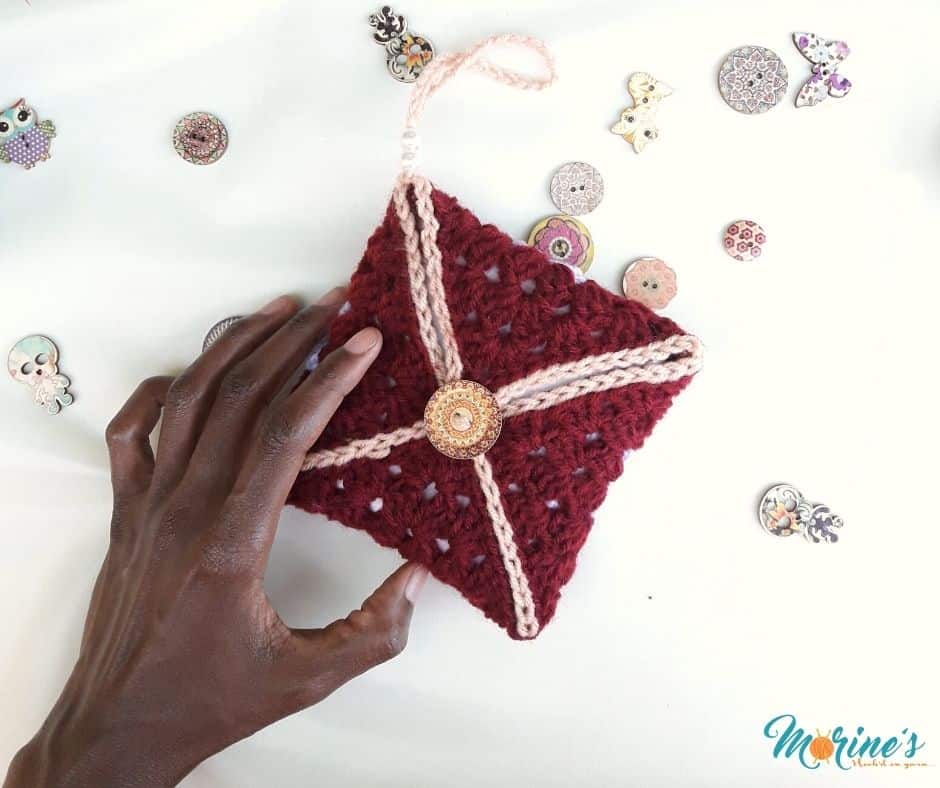
Step 4: Adding a strap (optional).
Since I’m going to be making this granny square pouch to be used as a period pouch, I decided to add a strap to make it easier to carry. You can skip this step if you’d rather your pouch not have a strap.
First, work out which side you want your strap to be on. After that, with the pouch opening facing you, find the middle stitch of the left edge. Insert your hook into this stitch and chain 32. Depending how long you want the strap, you can make more or less chains. Slip stitch into the corner stitch and fasten off. Thread 2 beads onto the strap.
And there you have it, your very own granny square pouch. These are so fun to make, don’t you think. I’d love to see your versions of this pouch. You can tag me on Instagram @morines_shop or share your projects on Ravelry.
Related Posts