In preparation of the Intarsia cushion covers that I’m releasing in a week, I thought I’d write a post on Intarsia crochet tutorial which includes all the tips, tricks and basically everything you should know.
Pin it now, try it later!
A little about intarsia crochet.
Intarsia crochet is a great technique that allows you to use multiple yarn colours in a row or round.
Although commonly worked in single crochet stitch, you can also work intarsia crochet in other stitches such as half-double crochet and double crochet.
1. Reading an intarsia crochet graph.
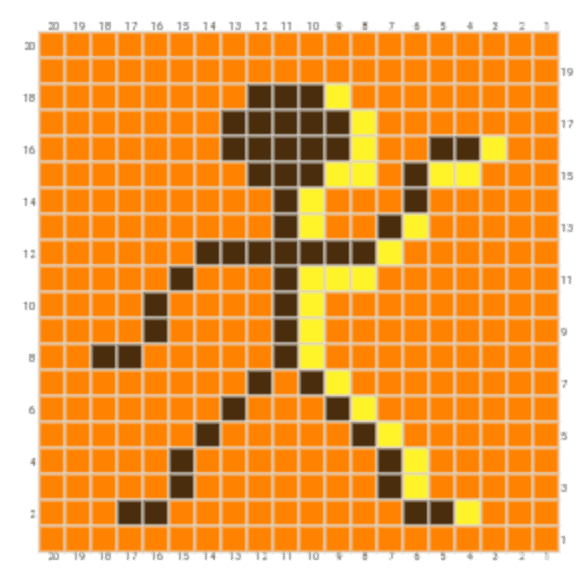
Most intarsia crochet patterns use a grid-based graph. In a grid, such as the one above, 1 square represents 1 stitch unless otherwise stated in the pattern notes. Here are some great tips:-
- A graph is read from the bottom and you work your way up to the top.
- The first stitch on the graph is located on the bottom right.
- When working on the right side, read the graph from right to left. And when working on the wrong side, from left to right.
- All odd numbered rows across represent the right side and likewise, all even numbered rows, the wrong side.
2. Colour changes.
To join a new colour, work the stitch as normal until you have 2 loops left on your hook. Wrap the new colour over the hook and pull it through the remaining 2 loops on the hook.


The yarn tails should always be on the wrong side of your work.
After joining a new colour, don’t fasten off unless you won’t be using it again. Instead, you will either carry this yarn throughout your work or simply drop it and pick it up later.
It’s also important to note that due to colour changes, you should stop and untangle your yarn every few rows.
Pin this blog post.

Intarsia crochet patterns.
If you want to try out some awesome intarsia crochet patterns, you may be interested in these crochet patterns.
Intarsia Crochet Tutorial.
Materials:
- Worsted weight yarn in Burnt Orange, Dark Brown and Yellow.
- 5 mm crochet hook.
Instructions:
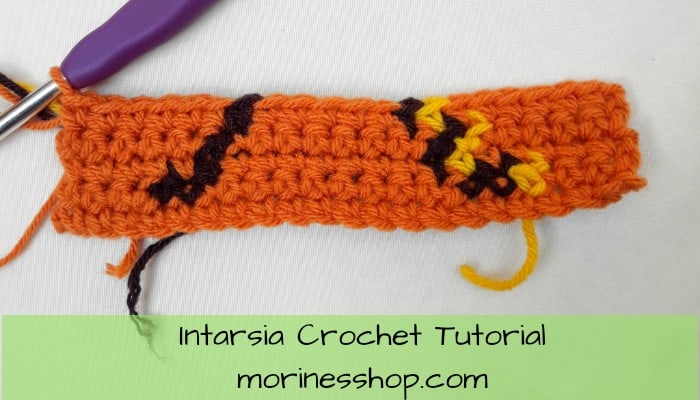
Let’s use the tips we’ve learnt and above to make a small swatch using the grid-based graph.

Row 1: Using burnt orange yarn, ch 21 and work sc in each st across.
Continue to follow the graph carefully noting which row you are currently working, when to place the colour changes and placing the yarn tails on the wrong side of your work.


And there you have it! At the end of you work, you want to darn in all your ends. You can use the method I showed you on the magic circle post to do that.
Sharing is caring!





iS THERE ANY WAY ONE CAN GET RID OF THE SPACES WHEN ONLY DOING ONE STITCH AT A TIME WITH INTARSIA. iT SEEMS TO COME OUT QUITE UNTIDY
Hello Susan. Are you talking about the spaces as you make colour changes?
I am left handed are there any tips for this technique
[email protected]
Left handed crochet is basically just a mirror of right handed crochet. In left handed crochet, you will follow the exact same instructions, but you will work in the opposite direction. This means that when you are working the rows, you will read row one on the graph from right to left but will be working into the foundation chain starting on the left side and working towards the right. You can alternatively use a mirror to flip the design and will therefore read & crochet the chart from left to right. I hope this helps.